Pages

Tuesday, April 20, 2010

spicy thai peanut noodles


I've been obsessed with this noodle dish and I'm finally sick of it, but it's delicious, so I thought I would share.
This recipe is adapted from several that I researched online and pieced together.  Also, I don't measure... I'm sure this will drive most of you crazy.

Grab a pot and start dumping the items in with the heat on medium.

Half a can of chicken stock (approximately 1/2 c.)
2 and a half spoons of peanut butter (dinner spoon, so maybe about 2 tbsp.)
1/2 a spoon of honey
3-4 garlic cloves
1 inch knob of ginger (cut up into chunks and press in garlic press)
2 spoons of soy sauce
1 spoon of rice vinegar (optional)
2 squeezes around the pot of Sriracha (add more or less depending on how much spice you like)

Garnish 
Handful of chopped cilantro (this is a must)
Lime (optional)
Chopped peanuts (optional) 

Taste it as you go, if you want more of a peanuty taste add more peanut butter, but try to balance the sweetness and saltiness too.  It shouldn't taste too sweet.  I let it boil for about 5-10 minutes.  Just stir it every now and then.  When you take it off the stove, let it sit and it should thicken up (hopefully), if not I'm not sure why.   

Boil some spaghetti noodles or thin wheat spaghetti which is excellent with this.  Garnish with cilantro, peanuts and a good squeeze of lime.  Oh don't forget to salt the pasta water.

* If you have a garlic press, it's nice to crush the garlic and the ginger with it.  The ginger is fibrous, so clean out the press as you go and toss it into the pot.

* If you don't have chicken stock, water and fish sauce works just as well.  Start with 1 tbsp of fish sauce and add by taste as you go.

This dish is great by itself or you can add any veggie, protein or both.  Whatever you have in the fridge or feel like that day.  
*Dish above has tofu, baby corn, snowpeas and onions 

Enjoy. 

Monday, April 19, 2010

Craft day – Painting no. 1


I initiated 'Craft Day' last week as a fun activity to do with my husband. We both haven’t challenged the right side of our brain in a while and this was designed as a fun exercise to help loosen up our creative side.

Rules of craft day:


· You get one hour and fifteen minutes to finish your artwork. The fifteen minutes is for you to use the next day, because it’s really helpful to step away from your art and come back to it with fresh eyes. (This is one of the most important lessons I learned in school.) I like having a time frame, because it forces you to commit and not doubt your choices.

· Don’t center the image. Or really try not too.


· Size requirement 5w X 5l X 2d inch bass wood boxes. We are sticking to this size, because we hope to create a quilt of these paintings for our wall or to stack them on the floor and go up. Plus, these wood boxes are really inexpensive and easy to find in Korea.


· A theme. Only because I like structure and it gives you a place to start, while adding imitations and challenges, which spices it up a bit.

· Media: We are fortunate to have a plethora of art supplies at our disposal; these are a few of the items that we’re going to use. Acrylic paint, pencil, ink, charcoal, pastel, gouache, watercolor, found paper and objects, fabric, oil pastel, prisma markers, magazine clippings and rubber stamps.


 Painting: no. 1  
Artist: ckim  
Theme: Anything goes  
Media: pencil / ink / paper scraps / magazine clippings / gouache  
Technique: Magazine clippings were dropped onto the board and glued down where they landed. 
April 16, 2010 


Painting: no. 1  
Artist: B
Theme: Anything goes  
Media: collage / wrapping paper / velum / magazine clippings / paper punch  
April 16, 2010

*Anything goes, really just means that you have no limitations. You can do whatever you want and use any form of media and style. 

*Both boards were primed with gesso and painted with acrylic 

*Although the backgrounds were painted the same color to start with, it is only a random coincidence that our pieces color coordinate. :)

Friday, April 9, 2010

"Come Out Rabbit"

Alice in Wonderland is one of my favorite stories of all time. Over the years, I've done drawings and illustrations mostly in ink, pencil and watercolor of Alice and her friends. Taking a modern quirky twist on the subjects and elements from the story. I'm currently attempting to relay the same twist at a grander scale with charcoal and acrylic. It's been over five years since I last painted regularly, so have some patience with me (this is mostly to myself).

I hope you all enjoy my take on Alice's story and come back to see more. I currently have five half finished Alice paintings in the series and hope to share them with you all soon.

Enjoy,

c


The story:
Alice is forever chasing the White Rabbit. This is her attempt to lure him out by pretending to be a rabbit.  Maybe now she can finally talk to him.  She has so many questions. 
Come out Rabbit 
ckim
2010 | acrylic & charcoal on wood panel | 43.5" X 71" 

Thursday, April 8, 2010

baguettes

This is the greatest recipe of all time!!!
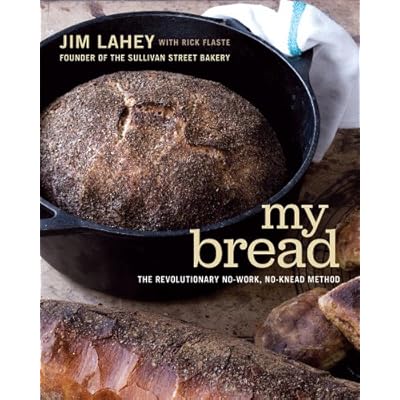
I originally found the No-Knead Bread recipe by Jim Lahey, before I left for Korea. That was the whole reason I had to buy a dutch oven before I left. Hee hee

The no-knead bread was delicious, but very crisp/hard and slightly burnt. It was the first time I used my oven in Korea and I may not have converted Fahrenheit to Celsius correctly. I have to give this bread another try, except I have moved on to making the No-Knead Baguettes and can't stop making them. I had to start substituting some of the flour to wheat flour, because we were consuming a large quantity of baguettes. The wheat is great in there too, but try the recipe without substituting first. 

 
No Knead Stecca (baguette) Recipe
By Jim Lahey

3 cups bread flour
1/2 teaspoon table salt
3/4 teaspoon sugar
1/4 teaspoon instant or other active dry yeast
1 1/2 cups cool 55-65F water
additional flour for dusting
1/4 cup extra virgin olive oil
3/4 teaspoon coarse sea salt or kosher salt

Optional: whole garlic cloves, olives, cherry tomatoes or anything that sounds good to you.


*All dry ingredients in before I add the water.


1.  In a medium bowl, stir together the flour, table salt, sugar and yeast. Add the water and, using a wooden spoon, mix until you have a wet, sticky dough, about 30 seconds. Cover the bowl and let sit at room temperature until the surface is dotted with bubbles and the dough is more than doubled in size, 10 to 18 hours.

*This is what the sticky dough should look like. 
Now just cover it and forget about it. 


*This is after 12 hours of sitting on the counter overnight. You will see bubbles on top of dough. This means you're very close to eating this delicious bread. 


2.  When the first rise is complete, generously dust a work surface with flour. Use a bowl scraper or rubber spatula to scrape the dough out of the bowl in one piece. Fold the dough over itself two or three times and gently shape it into a somewhat flattened ball. Brush the surface of the dough with some of the olive oil and sprinkle with 1/4 teaspoon of the coarse salt (which will gradually dissolve on the surface).


 *I'm so lazy I don't even fold the dough over. I just scrape the dough out of the bowl with wet hands and tuck all the sides towards the back so the top of my dough is smooth and the seam is on the bottom. I set this down on a floured tea towel and place it back into the bowl. Brush the top with olive oil, sprinkle with salt and tuck the tea towel over the dough. Don't forget to sprinkle the salt on top of the dough. I use sea salt. Let rest for 1-2 hours.

3.  Place a tea towel on your work surface and generously dust it with flour. Gently place the dough on the towel, seam side down. If the dough is tacky, dust the top lightly with flour.  Fold the ends of the tea towel loosely over the dough to cover it and place in a warm, draft-free spot to rise for 1 to 2 hours. The dough is ready when it is almost doubled. If you gently poke it with your finger, it should hold the impression. If it springs back, let it rise for another 15 minutes.

4.  Half an hour before the end of the second rise, pre-heat the oven to 500F, with a rack in the center. Oil a 13″ x 18″ x 1″ baking sheet.

5.  Cut the dough into quarters. Gently stretch each piece evenly into a long, thin, baguette shape approximately the length of the pan. Place on the pan, leaving about 1 inch between the loaves. Brush with olive oil and sprinkle with salt.

(Don't forget to add garlic, olives or tomatoes.  I used the fat green olives, because that's all we have here, but kalamatas would be yummy too!)
 

*I cut the dough in quarters with a knife to get 4 balls of dough. Then I stretch the dough with my hands to get 4 loafs. They do not have to look perfect. My oven here is mini sized so my baguettes are not as long and stick like, but shorter and fatter. I would use a regular baking sheet if you have a normal oven. 

*Don't forget to drizzle olive oil and sprinkle salt on the tops of each loaf. It really does make all the difference.

6.  Bake For 15 to 25 minutes, until the crust is golden brown. Cool on a pan for five minutes, then use a spatula to transfer the baguette to a rack to cool thoroughly.


*I think my tops are not as brown, because my oven does not go up to 500F.
FYI - I don't let it cool.  
Just take a bite!  
So delicious. 

Note: The baguette may become a bit soggy in just a few hours because of the salt on the surface. If that happens, reheat the loaves in a hot oven until crisp.

Baguette (Stecca) Recipe:  My Bread: The Revolutionary No-Work, No-Knead Method 
by Jim Lahey

Monday, April 5, 2010

In search of my double

 
As soon as I set foot in this country, I've been on the search for my double and what better place than the motherland.  All my life, I have never seen anyone that even resembles me.  I always see people that look like other people I know, but I’ve never seen another person look like me.  

I've gotten to the point of obsession (no surprise there), which is now driving my husband crazy (shocker).

I will even take a hybrid, but so far NOTHING.  

A 'hybrid' is when the nose up or the eyes down for example, resembles someone I know.  

So far, I've seen two hybrids of my brother Peter and his double.  Who looked at me like he recognized me, but my husband thinks it's because I was starring and looked like a crazy person on the street.

Four hybrids of James (another brother) and his double, a few hybrids of my mom and my dad seems to be everywhere.  Apparently on several occasions, my husband has almost gone up to strangers and called them dad in Korean.  (I think that would be funny :))

I see aunts, uncles, cousins, family friends and there kids roaming the streets of Daegu. I've even seen a double of a non-Korean friend, if she was heavier and Korean.   My cousin's plumper double works at this travel agency I popped into and they even have the same exact voice.  I was so stunned when I met her; I think I just started with my mouth open.  She looked at me strangely, because I forgot to answer her. I wanted to go back and show her the picture of my cousin and have them talk on the phone, to hear the voice similarities, but my husband put the kibosh on that.  He wants me to leave the travel agency lady alone and doesn’t think she would be interested. 

I would be excited if someone introduced me to my double (obviously, since I’m on the search). 

It's now gotten to the point where I‘m resentful, when I see someone else's double and start ranting about it to myself and to my husband.  But I plan to continue seeking for my doppelganger while we are here, so keep your fingers crossed and hopefully I’ll be able to post a picture of her soon.

Wednesday, March 31, 2010

Let them eat... a casserole?

Marie Antoinette happens to be one of my favorite historical figures. I've always been intrigued with her story or it could be the whole decapitation thing, I find relatable.
I've always had this bizarre fear of being decapitated and wonder if I was beheaded in another life.
Anyhow, back to ceramic bake and dishware. :)

How fun is this collection by Marta Giardini?  The hairstyle of this period is the influence of this collection. I love it!

Maria Antonietta Collection
Designed by: Marta Giardini  
Made for DMK Design
www.dmkdesign.it/en

Artist above:  Martin II Mytens, "Archduchess Marie Antoinette Habsburg-Lotharingen (1755-93)"

Monday, March 29, 2010

pierogi night!


Yes, friends.  I really did, hand make pierogies.   What can I say... I had a craving and I was desperate.  

Being in Korea, I can't just pop into Trader Joe's, for their frozen potato cheddar pierogies and pop them into my belly.  (Yes I said, Trader Joes. I know it sounds odd, but they really are delicious.)

I also can't find an excuse to be in Seattle and drop by Piroshky Bakery.  Ahh, just thinking about that bakery is making me crave them again. 

So out of shear desperation, I pulled out my rolling pin and tried this recipe from allrecipes.com.  The pierogies turned out to be quite delightful with a 'homemade look'.  Meaning... not as aesthetically pleasing since I've never really used a rolling pin before.

We boiled them in salted water and slathered them with sour cream.  It was delicious.
The dough was really thick and chewy (not in a bad way), probably due to the fact that I didn't roll them thin enough.  Maybe?

Overall this recipe was easy and did not take too much time, which are the requirements I look for when cooking. I give it 4 1/2 stars.
 
Oh yeah, about a week after my pierogi experiment, I remembered that Busan has a huge Russian population and I bet I could find tasty and authentic pierogies or pirozhki there.  Dammit it! 

Pierogi Recipe
http://allrecipes.com/Recipe/Pierogi-Polish-Dumplings/Detail.aspx 

If you're ever in Seattle.
http://www.piroshkybakery.com/ 

At a Trader Joe's near you.  Not me. :(
http://www.traderjoesfan.com/Trader_Joes/potato_cheddar_pierogi/details/ 

string heart

so sweet... 
this ring is a beautiful piece of art.

bean-ring-heartbeat, silver, pearl, thread
designed by Katrin Jaeger
www.katrinjaeger.com

Sunday, March 28, 2010

I ♥ U

This pigeon lamp makes me so happy.


Grey Pigeon Lamp
Designed by Thorsten Van Elten  


Friday, March 19, 2010

"family portrait"


Me, my husband & Steve the Dog.

Wednesday, March 17, 2010

I’ve been assimilated.


So… I’ve lived in Korea for five months and yesterday I bought a cat bag. Yep, a CAT bag, it’s not a typo.
Last week I purchased my first pair of Korean footwear. This is not something I would have purchased five months ago. It’s not even the pair I was eyeing through the window that enticed me to go into the boutique. Don’t get me wrong. I would have thought they were cute, but super fem and sooo not me. I thought the sparkly pink shoes were a fluke, but the cat bag sealed the deal. I’ve officially become assimilated to the “Korean style”.